 Sometimes, I want a simple, quick way to creatively express my spirituality.
That’s not my usual mode. Most of the time, I’m a do-it-from-scratch girl. I spin fibers into yarn, then weave the yarn into magical hats to keep me warm in winter. I dye fabric and paint my own designs on it to make altar cloths. I cure a piece of wood for months, if not years, and then sand its rough surface for hours, smoothing it to create a talisman. … Well, it’s not completely from scratch: I don’t harvest all my own wood, rarely concoct my own fabric dyes, and have never raised sheep for the wool fibers I spin.
In any case, sometimes, with my busy schedule, I want a project I can finish quickly. So, when Stencil Revolution offered me free stencils, I was delighted.
I chose four designs, each of which is available in various sizes. Below you can see the sizes I chose:
* DEER ANTLERS STENCIL, 8.5″x11″: https://www.stencilrevolution.com/products/deer-antler-stencil
* CRESCENT MOON STENCIL, 8.5″x11″: https://www.stencilrevolution.com/products/crescent-moon-stencil
* TRIBAL RAVEN STENCIL, 8.5″x11″: https://www.stencilrevolution.com/products/tribal-raven-stencil
* ARROW KIT STENCIL, 5″x6″: https://www.stencilrevolution.com/products/arrow-kit-stencil
Much as I revel in coming up with my own designs, it was fun to work with someone else’s. And Stencil Revolution allows you to bring beautiful artwork into your home without having to pay an arm and a leg. All that’s needed is a stencil, a bit of paint, a paintbrush, and a few common household items, such as masking tape to hold a stencil in place while you apply paint.
… And, of course, an item to stencil. A friend had gifted me gorgeous pieces of weathered lumber.
Not wanting the projects to be costly, I decided a white paint and a black paint would be enough. I chose the 2.25 oz size of Jacquard Neopaque Black and Jacquard Pearlescent White. Those little sizes are enough to do oodles of small projects.
I chose those paints because they’re inexpensive, excellent products, easy to use (simple instructions are on the bottle), and, being a bit thick, are less likely to bleed past the cut edges of the stencil. They’re also suitable to cloth, wood, and other surfaces.
If you apply these paints to fabric, it is washable, once set. Easy setting instructions are on the bottle.
I found the paints at a good price here: https://www.dharmatrading.com/paints/lumiere-and-neopaque.html
I suggest a test run on a piece of paper, thick card stock, or old cloth, just to get the hang of stenciling.
Usually, I tape all four sides of the stencil down to the surface I am going to stencil. But, for the wood projects in this post, the stencil edges extended past the top and bottom of the pieces of wood I chose:
When painting, I pressed down with one hand on the stencil, right by the cut edges of where I was painting, to moosh the edges flat against the wood, so paint wouldn’t run under those edges.
I used too much paint, so some of it crept under the edges. The use of old timber contributed to the bleeding; as gorgeous as the reclaimed wood is, it’s an uneven surface. But I’m still quite happy with how the projects turned out.
The next time I might, instead, use a near dry brush, then remove the stencil, and fill in paint where needed.
Another lovely option is Shiva Iridescent Paintstiks. These gorgeous oils are dry sticks that you rub on, so when you stencil, they don’t bleed, but create sharp, crisp edges. I’ve used them to stencil clothing, and I imagine they’d work well on other surfaces: https://www.dharmatrading.com/markers/shiva-paintstiks.html
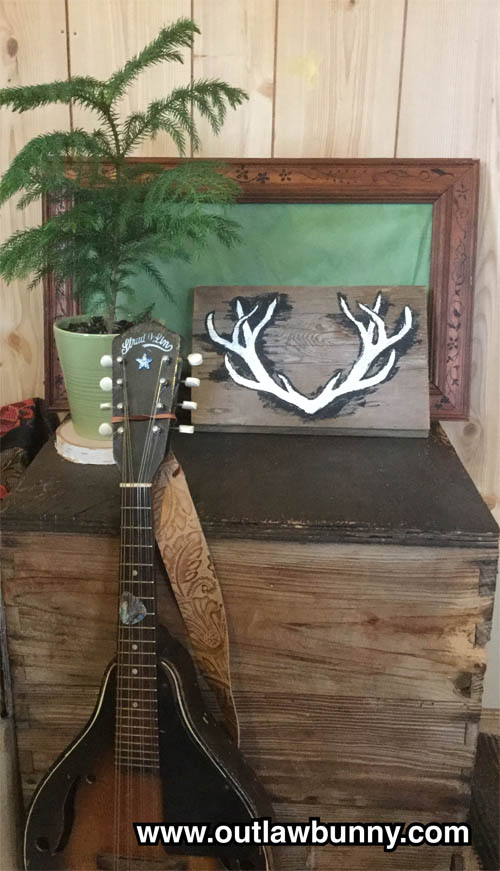
When I removed the deer antler and crescent moon stencils, and saw the bleeding, it was tempting to give up and abandon my projects. But I’ve learned that a “mistake” in the creative process is an opportunity to make the project better than I’d originally envisioned it.
I used a Q-tip, toothpick, or X-Acto knife—depending on which worked best where—to scrape off as much of the unwanted wet paint as I could.
Then, for the antlers, I used black paint to draw the outline that had been intended in the stencil. I drew freehand instead of stenciling. Then, to continue covering up the white paint bleed, I extended the black, roughly surrounding the antlers.
I like the effect. Its roughness and hand-painted quality go well with the aged timber. The bleeding was lovely synchronicity. Without it, I never would’ve thought to add the black paint.
The moon stencil was quite forgiving, when it came to bleeding. A few brushstrokes to spread the paint a bit in a couple of places did the trick.
The final results:
The bleeding in the moon project, too, was lovely synchronicity. The Gods are always with us when we’re creating. The outer curve of the moon stencil is a smooth line (see below), but bleeding paint made that edge ragged, which looks beautifully natural, like the moon’s actual bumpy surface. Since the inside curve of the stencil is bumpy, it was nice that the outside ended up matching.
Next, I used the raven stencil and part of the arrow kit stencil on a scarf. I applied a light application of paint, so there was nowhere near as much bleeding. I’ll love wearing the scarf.
In fact, I like the sort of batik look created by the combination of a bit of bleeding and my using a brush that had less paint on it. And, after removing the arrow kit stencil, I was able to, freehand, easily add strokes here and there to make everything look pretty, yaya!
On my walks, I see raven feathers on the ground. I never pick them up. To me—and this is just my personal interpretation, I’ve never read this anywhere—Raven Spirit drops a feather by me when I need a reminder to live in the moment, focusing on enjoying my walk, rather than being distracted by worries, resentments, or the gathering of feathers. When I put on the scarf to keep me warm for my walk, the raven and its falling feathers on the scarf will be an additional reminder.
When stenciling on cloth or paper, lay it on a smooth, hard surface, to avoid bleeding. If stenciling the front of a T-shirt, stick flat sheets of newspaper or something else absorbent inside the T-shirt, so the paint doesn’t leak onto the T-shirt’s back.
I’m a perfectionist. Going with the flow and experimenting allows my high standard to remain without stopping a project dead in its tracks. Not every piece works out but, if I just keep going with it, good chance it pans out beautifully.
Stencil Revolution has all sorts of stencils for the Pagan, nature lover, tree hugger, boho spirit, and DIY Goddess. You’ll find feathers, paw prints, dream catchers, the tree of life, Halloween decor, huge mandalas for the wall, and lots more. There’s even a pentagram: https://www.stencilrevolution.com/products/pentagram-stencil
What an easy way to turn fabric into altar cloths or festival banners, or to adorn a ritual robe or T-shirt.
A last little tip: Once your project is done, and your stencils are washed and dry, keep them flat by storing them in the cardboard envelope in which they were shipped.
The Divine celebrates your creativity. Have fun.


